As a professional jewelry packaging manufacturer, we receive sampling requests from global brands every day. Many clients are unfamiliar with the sampling process, leading to repeated revisions, delayed delivery, or even mass production errors. From the perspective of a packaging factory project manager, this article breaks down the 5 key steps of custom jewelry packaging sampling – from artwork to sample approval – and shares common pitfalls along with how to avoid them. Whether you are sourcing custom printed jewelry boxes or high‑end gift boxes featuring jewelry packaging with logo, this guide will help you move through sampling efficiently and ensure mass production quality.
Step 1: Artwork Processing & Structural Drawing Creation
After receiving the client’s design files, the first step is to translate the creative concept into production‑ready engineering documents. Clients typically provide AI, SVG, or high‑resolution PDF files. We then annotate key information in AI or CAD software: unfolded box dimensions, bleed areas, Pantone codes, foil/embossing positions, die‑cut windows, etc.
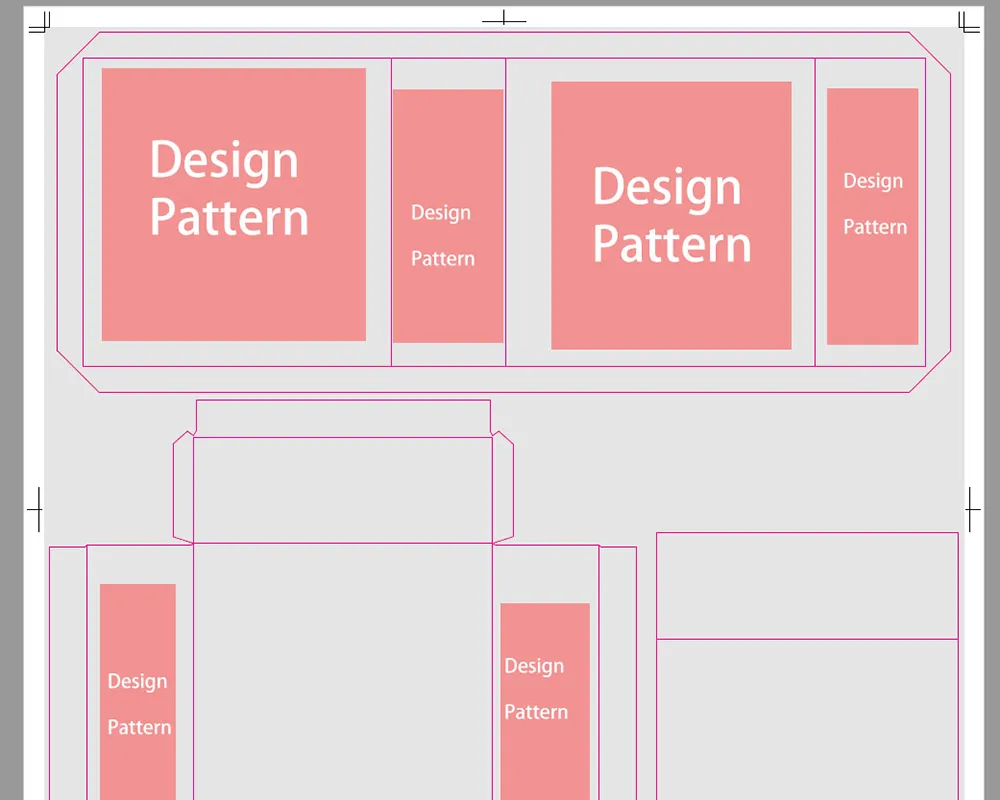
Artwork Processing & Structural Drawing Creation
Common Pitfalls & How to Avoid Them
- Pitfall 1: Low resolution or wrong color mode – Images provided at only 72dpi or RGB values cause color shifts in printing.
Solution: Clearly request files at 300dpi or higher, in CMYK mode. For spot colors, always require Pantone numbers. Provide a “Design File Specification Checklist” during initial communication.
- Pitfall 2: Missing foil/UV positions or dimensions – Some design files only show a mock‑up without die‑cut lines, making it impossible for structural engineers to work precisely.
Solution: Mark foil areas with red dashed lines and UV areas with blue lines, and include text notes. Also confirm all fold lines and cutout positions.
Real case: A client sent a beautiful render but didn’t specify the bottom lock dimensions. Based on our standard experience, we made the lock. After receiving the sample, the client felt the lock was too large and not refined enough – it didn’t meet their expectation. After the client provided a physical reference and clear dimensional tolerances, we reworked the lock and the final sample was approved. We strongly recommend clients provide as much detailed dimensions or physical samples as possible during the design phase to better match expectations.
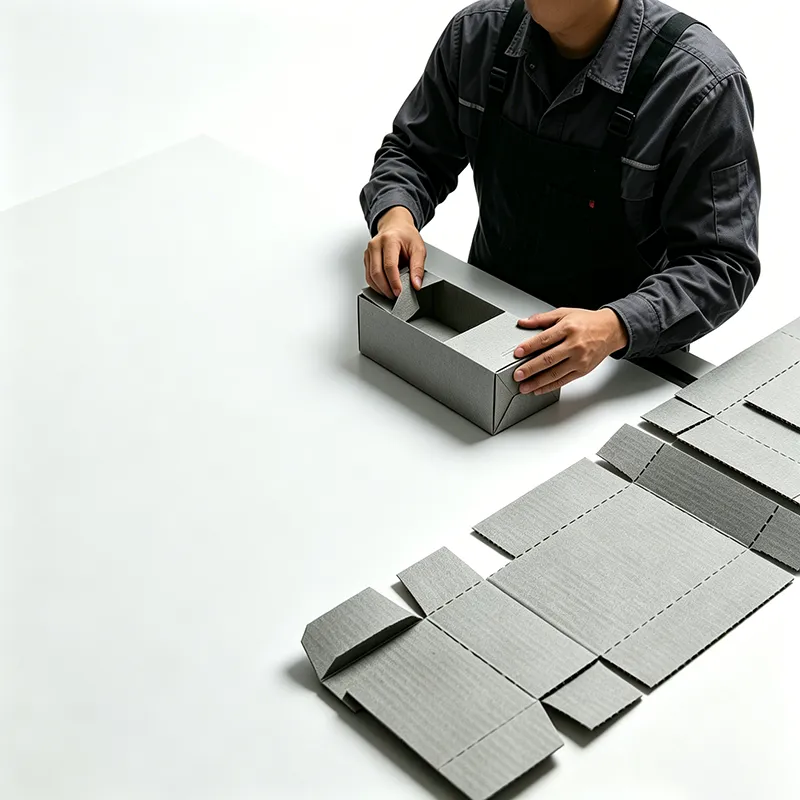
Step 2: Structural Sampling (Laser Cutting / Handmade)
Structural sampling validates the die‑cut line, folding smoothness, and gluing accuracy. We use a laser cutter to cut the flat layout on grey board or cardstock, then hand‑fold and glue it into a box. This step does not involve printing – it only confirms the physical structure of the box.

Structural Sampling (Laser Cutting / Handmade)
Common Pitfalls & How to Avoid Them
- Pitfall 1: Ignoring paper grain direction, causing cracks on folds – If the paper grain runs parallel to the fold line, the board may crack.
Solution: Check paper grain direction before sampling; adjust die‑cut orientation so folds run perpendicular or at 45° to the grain. For thick boards, pre‑crease before folding.
- Pitfall 2: Glue flap too narrow or improper adhesive – leads to weak bonding or glue seepage.
Solution: Keep glue flap width at least 15mm. Use suitable eco‑friendly adhesive and test bonding strength during sampling.
Real case: For a jewelry packaging with logo project, the client required no visible glue marks on the box surface. We switched to hot‑melt adhesive dots and recessed the glue flap by 2mm, resulting in a flawless sample. We recommend clarifying adhesive requirements during the structural sampling phase.
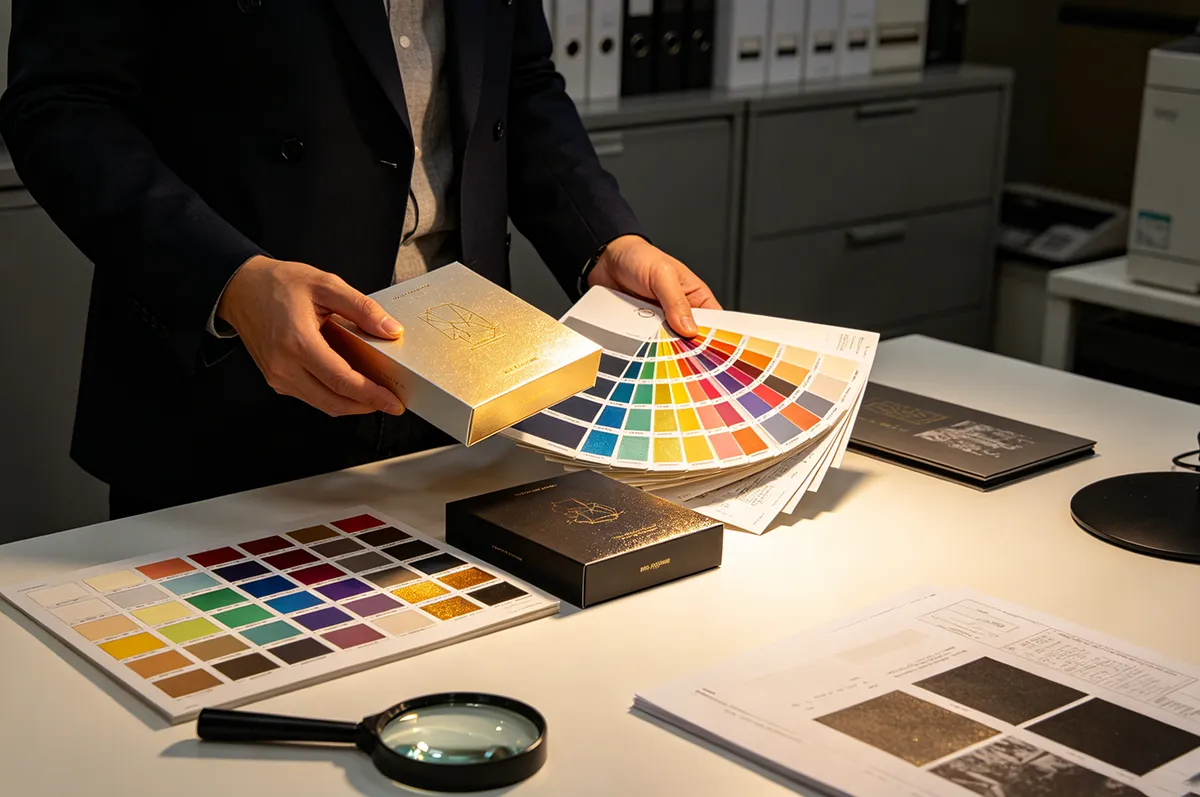
Step 3: Printing Proofing (Color, Foil Stamping & UV Effects)
Printing proofing is the most critical step, directly affecting the final visual outcome. There are two common methods: digital proof (printed on a digital printer on specialty paper) and press proof (printed on an actual printing press). Digital proofs are lower cost and faster, suitable for confirming layout and basic colors; however, only a press proof can accurately reproduce spot colors, foil brightness, and UV dimensional effects.
Printing Proofing (Color, Foil Stamping & UV Effects)
Common Pitfalls & How to Avoid Them
- Pitfall 1: Color deviation between digital proof and press proof – Client approves a digital proof, but bulk production colors look completely different.
Solution: Clearly state that digital proofs are for layout confirmation only – colors are for reference. For color‑critical orders, a press proof (or standard Pantone swatch comparison) is mandatory. We recommend contract wording: “Bulk colors must match the press proof.”
- Pitfall 2: Foil stamping misalignment or poor adhesion – caused by low‑precision foil plates or coated paper surfaces.
Solution: Ask the supplier to provide registration marks for the foil plate and test adhesion during proofing (tape test). For large foil areas, apply lamination before foil stamping.
Real case: A custom printed jewelry boxes order – the client insisted on a digital proof only. During mass production, the spot red turned into a dark red, and the client rejected the shipment. The factory absorbed part of the reprint cost, and both parties shared the loss. The lesson: for premium packaging, a press proof is essential.
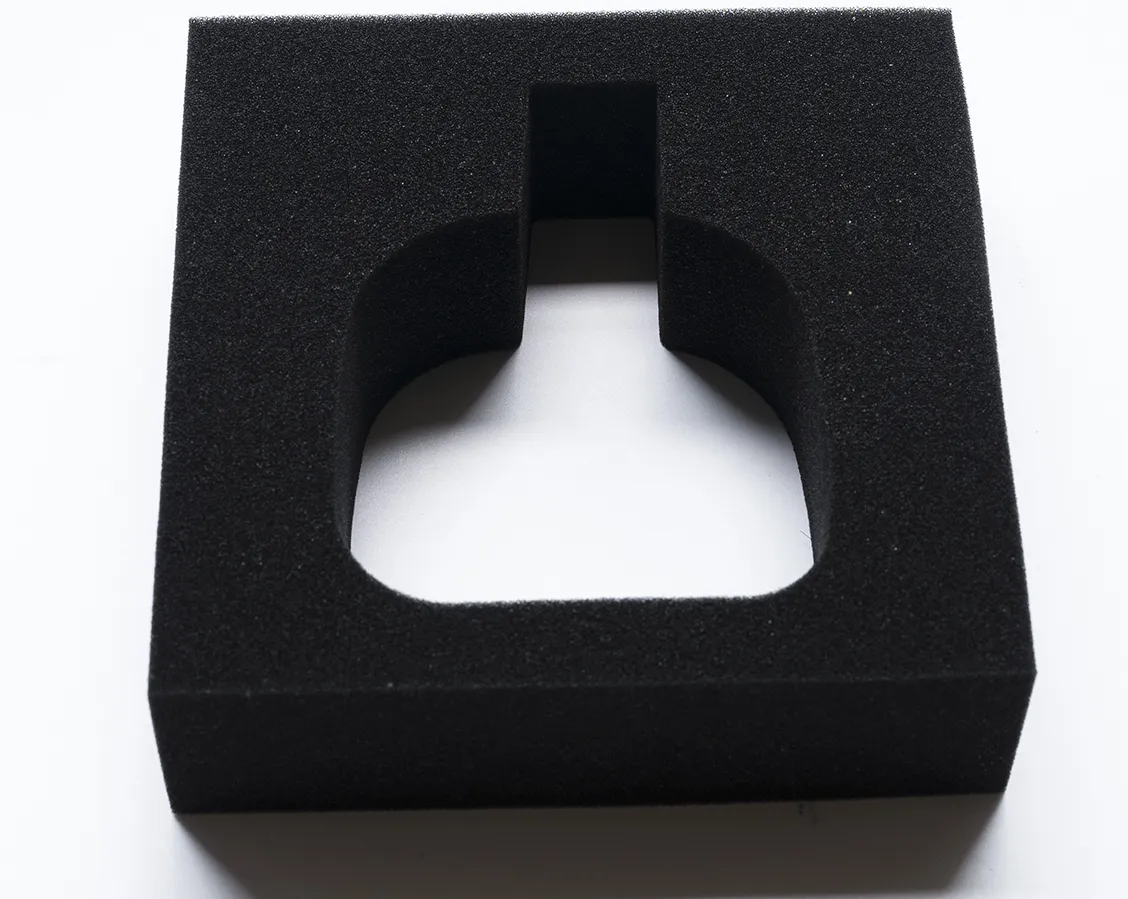
Step 4: Lining Sampling (EVA / Foam / Velvet – Hardness & Fit)
The lining is key to protecting the jewelry. Common materials are EVA, polyurethane foam, and velvet. Sampling needs to confirm thickness, hardness, die‑cut precision, and how well the lining conforms to the product. For standard rectangular cavities, only product dimensions and a centered position are needed. For irregularly shaped items (e.g., curved pendants, bracelets), a contour drawing or an actual sample of the product is required.
Lining Sampling (EVA / Foam / Velvet – Hardness & Fit)
Common Pitfalls & How to Avoid Them
- Pitfall 1: Cavity too tight or too loose – too tight scratches the product; too loose lets it move around.
Solution: Test with the actual product during sampling. Leave a 0.5–1mm tolerance per side. For velvet‑lined cavities, account for the pile thickness.
- Pitfall 2: Wrong hardness of EVA or foam – too hard may damage the product, too soft offers insufficient support.
Solution: Choose density based on product weight. Light jewelry → 18‑22kg/m³ foam; heavy items → 38‑45kg/m³ EVA. Press and test resilience on samples.
Real case: A jewelry packaging manufacturer customised a bangle box with high‑density EVA precision‑carved to the bracelet shape. After the first sample, the bracelet was too tight and hard to remove. We revised the toolpath, added 0.8mm clearance, and left finger recesses at the bottom – the client was very satisfied.
Step 5: Sample Approval & Sealing
After all sampling is completed and the client approves, the final step is sealing samples. Sealing means the approved sample becomes the quality standard for mass production. A signed Sample Approval Form (or email confirmation) is required, and physical samples must be kept on the production floor.
Common Pitfalls & How to Avoid Them
- Pitfall 1: Verbal approval or no written record – leads to disputes over quality issues.
Solution: Always use email or signed confirmations, and keep all communication records. Confirm box construction, colors, finishing, lining, packing method, etc.
- Pitfall 2: No physical sample retained – workers have no reference, causing variations.
Solution: Split the sealed sample into two – one for the client, one for the factory. Hang a sample on the production line and compare each batch.
Real case: A client verbally approved a sample over the phone without written confirmation. After bulk delivery, the client claimed the foil position was off by 1mm and demanded a remake. Without a sealed sample, the factory had to share the loss. Since then, we require every client to confirm by email and return one sealed sample.
Sample Approval Checklist Template (Recommended to Print)
Before signing the Sample Approval Form, check each item below:
- Box structure: □ unfolded dimensions correct □ folding smooth □ gluing strong □ window position accurate
- Printing colors: □ spot colors match Pantone □ CMYK no color shift □ foil stamping position & brightness □ UV pattern clear
- Lining: □ product inserts and removes easily □ hardness appropriate □ velvet no shedding □ EVA cut edges smooth
- Logo & text: □ content correct □ typeface legible □ position centered or as designed
- Packaging method: □ each box in individual OPP bag □ carton dimensions & markings correct □ moisture protection applied
- Other: □ magnet strength (if any) □ hinge durability □ desiccant (if any)
Approval result: □ Pass – approve mass production □ Needs revision (attach comments)
Signature: _____________ Date: _____________
Conclusion
The custom jewelry packaging sampling process may seem detailed, but every step ensures mass production quality. As a professional jewelry packaging manufacturer, we recommend clients actively participate in each stage, especially press proofs and sample sealing. If you need support with custom printed jewelry boxes or jewelry packaging with logo sampling, feel free to contact us for one‑on‑one guidance and a sampling quotation.
→ Request a sampling quotation or professional sampling support: visit our Contact Page or send an email to our team.
Original content. For more packaging knowledge, visit our Resource Center.
Recommended Further Reading:
 We like to do design according to all the customers' requirements, or offer them our new designs. With strong OEM/ODM capabilities, we can fill your sourcing demands.